The first set I bought from the new Annual Catalogue that was released in May 22 was the Nature’s Prints stamps and dies. It also comes with beautiful designer series paper in blue and gray tones called “Sun Prints”. In the background, I also used the new “Fern 3D” embossing folder. You can buy the Sun Prints bundle and save 10% on the stamp set and dies! The card base is made with Night of Navy cardstock. The Scalloped rectangle is cut from the Scalloped Contours dies.
Material:
Stamp set: Nature’s Print
CS and paper: Night of Navy, Whisper White, Sun Prints DSP
Ink: Night of Navy, Sahara Sand
Tools: Nature’s Prints dies, Scalloped Contours dies, 3D Fern embossing folder
The new Daffodil Daydream stamp set is perfect for Spring! With greetings for Easter and Mother’s Day, it also has coordinating Daffodil dies!
For this card, I wasn’t sure if I was pleased with the stamped border both at the top and at the bottom, so I ended up doing 2 versions of the same card. They are very similar, but you can let me know which one you prefer!
Here’s the second card I made with the Daffodil Afternoon Designer Series Paper. This paper is one of the Sale-a-bration item, which is only available until February 28th! So if you want it, don’t wait, because it will be too late!
For this card, I used crooked strips, so it’s a little more visually appealing! You could also use straight strips if you prefer!
Using strips that are cut at different angles makes it much more difficult to align everything perfectly as the top. So here’s my tip, cut 2 rectangles of black card stock, one slightly bigger than the other (about 1/4″ taller and wider, so it’s about 1/8″ all around.) Put all your strips on your smaller black card stock and leave the strips sticking out on both sides. Then cut the strips flush with the rectangle with your paper trimmer, as seen on the picture below. When this is done, mount it on your bigger Black card stock to add the outer edge all around.
To complete the card, I used a black lacy ribbon (retired) and a butterfly from The Brilliant Wings die set. Adhere your card front on the Pear Pizzazz card base.
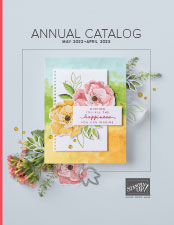
Have you seen the Daffodil Afternoon Designer Series paper that you can get as part as the Sale-a-bration sale? It’s very pretty with bold colors, and perfect for this fun technique of “floating strips”. For this technique, you also need a sheet of transparent plastic, which is called “Window Sheets” (see p.136 of the annual catalogue.) The designer paper used on this card is only available until the end of February!
So first, here’s the final card:
It’s not so obvious to see from the picture, but the strips of paper are raised from the card base with dimensionals, as you can see in the following picture. This is why this technique is called “floating strips”…
By using a window sheet to adhere your strips, you make everything more sturdy and it’s much easier to align everything this way.
To make the card, first cut a 3-inch circle in the window sheet. Then with your snail adhesive, glue each strips of paper on the circle. Alternate the colors and width of papers. Leave a little gap between each strip. Paper scraps are perfect for this technique! Don’t worry if the strips are too long. It’s much easier to cut them after, as seen on the picture below. When your strips are all in place, run your circle through the big shot again to cut the excess paper or use scissors and follow the plastic circle as your guide.
To complete the card, I added a black butterfly from the Brilliant Wings dies as well as flower from the Meadow dies. The white background is embossed with the Tasteful Textile 3D embossing folder. The greeting is from the SAB stamp set “Driving By”.
The Sale-a-bration is almost over, so don’t wait to the last minute to get your free item! (Get a free item with every $60 purchase until February 28th only!) Today’s card is made with the SAB stamp set Awesome Otters and the SAB Friendly Hello Designer Series paper. I also used 2 stamps from the SAB Friendly Hello stamp set! Can you spot them?
The balloons that the otter is holding are from the Friendly Hello set, and they are actually supposed to be some kind of flowers I suppose, but don’t you agree they look like balloons? I also used them in the background to create my own Designer Paper since I wanted to bring in the Granny Apple Green color in the card.
CS and paper: Shaded Spruce, Whisper White, Granny Apple Green
Ink: Black Memento, Granny Apple Green, Pool Party, Crumb Cake; Bermuda Bay marker, Stampin’ Blends Granny Apple Green, Crumb Cake, Purple Posy; Skin Tone Blendabilities.
Sale-a-bration is in full swing with one more month to go! Today I would like to present you 2 cards made with the Sale-a-bration “Friendly Hello” stamp set and coordinating Designer series paper! Both cards are based on the same template as you will see, using the Designer paper in the background and a stamp as the focal point, with a bit of coloring. The greeting is also from the same set!
What I really like with this set is that the images on the paper are coordinated with the stamps, so it matches perfectly! Which one is your favorite?
“Driving By” stamp set is another FREE item from the Sale-a-bration brochure that you can get with a $60 purchase! This is the perfect set to create simple and quick cards for kids, man, and anyone’s birthday! All you need is a little coloring and some scraps from colorful Designer series paper! For this card, I used the new Flowering Fields Designer Series paper (red polka dots) and the Sale-a-bration paper “Daffodil Afternoon” (yellow strip). I also used the birthday hat and greeting from the Awesome Otters stamp set to complete the Birthday theme of this card!
Material:
Stamp set: Driving By (SAB item), Awesome Otters (SAB item)
CS and paper: Bermuda Bay, Whisper white, Flowering Fields Designer Series paper Daffodil Afternoon (SAB item)
Ink: Black Memento, Stampin’ Blends markers and Blendabilities markers (retired) Real Red, Daffodil Delight, Coastal Cabana, Basic Gray
One of my favorite set, and for sure the cutest stamp set of the Sale-a-bration brochure, is the “Awesome Otters” set (see it on p.11)! Here’s the first card I made with this set. I also used the Simply Marbleous Designer Series paper in the background, which is also a Free item that you can get with any $60 purchase!
The card base is Bermuda Bay cardstock. I colored the otters with the Stampin’ Blends markers. As a finishing touch I added a few silver sequins!
Material used:
Stamp set: Awesome Otters (SAB item)
CS and paper: Bermuda Bay, Whisper White, Basic Black, Simply Marbleous DSP (SAB item)
Ink: Black Memento, Pool Party, Stampin’ Blends markers: Crumb Cake, Bermuda Bay
Each year after the holidays, Stampin’up has his Sale-a-bration sale! Choose a FREE Sale-a-bration product with every $60 or $120 you spend (before tax and shipping.)
More over, host a party or collect orders from your friends and family and receive the exclusive Calming Carmelli Stamp set for FREE!
I always start my Christmas cards early, so I have more time to do everything else (shopping, cooking, baking, etc) after! So today is my first Christmas card of the season that I would like to share with you!
I used the beautiful dies called Poinsettia and the matching stamp set “Poinsettia Petals”. I used Old Olive as my card base color combine with a strip of the Gingerbread & Peppermint Designer Series paper outlined by Real Red card stock. The flowers are made with Real Red and Whisper White cardstock, and I also used the Red foil sheet for a little sparkle!
Material:
Stamp set: Poinsettia Petals
CS and paper: Old Olive, Real Red, Whisper White, Mossy Meadow, Gingerbread and Peppermint DSP, Red Foil.